Welcome!

Welcome to Eat Well, Backpackers!

The blog page contains all information in no particular order. Use these links to find what you need. This is a work in progress. A lot of information needs to be added yet.

Blog     General How-To    Recipe Index     Menus- Breakfast    Menus- Cold Meals    Menus- Hot Meals    Menus- Snacks    Product Reviews    Packaging   

Creating this blog is my ultimate decision for how to handle the ongoing interest in how I have prepared food for backpacking over the years. For a long time my thinking was stuck on the idea of a book, but this topic is too dynamic for that rigid of a format. On the other hand, I didn't want to provide all this information completely free of charge.
Therefore, this blog will have advertisements showing. You are free to ignore them or not. They do help me in a small way.
I collect no information from visitors to this page.

Thursday, March 21, 2019

How to Dry Herbs


General How-To

Provides vegetables, fiber, color and flavor in the diet.

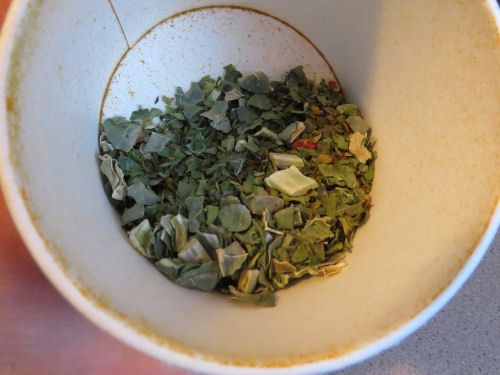
I am defining herbs as leafy greens that have a high water content and which dry to the point that they can be crumbled or powdered. Examples are:
Kale
Spinach
Parsley
Dandelion greens
Carrot greens
Celery leaves
Beet greens
Chard
Green Onions
Other leafy greens


The important things about drying herbs are 1) make sure they can't fall through the drying rack 2) make sure they won't blow away if your dehydrator has a fan.

At Home:

1. Be sure the greens are clean
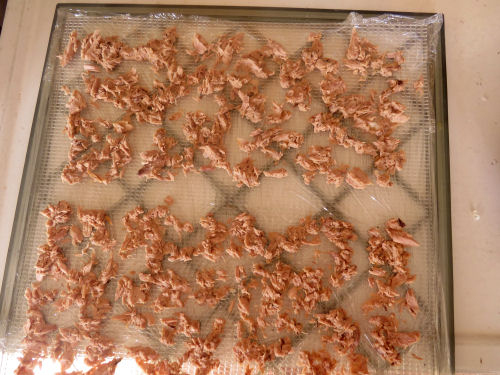
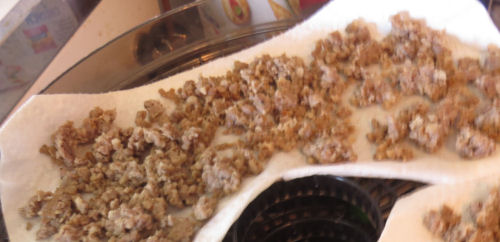
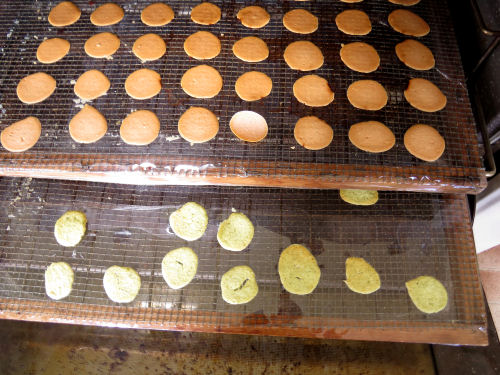
2. Spread in a thin layer on paper towels in the dehydrator OR spread in a thin layer on a cookie sheet
3. Cover with some kind of mesh (in the Excaliber dryer you can use one of the nylon racks) or more towels weighted at the corners, if your dehydrator has a fan
3. Dry thoroughly- until the greens will crumble
4. Crumble into bits or into powder depending on how it will be used.

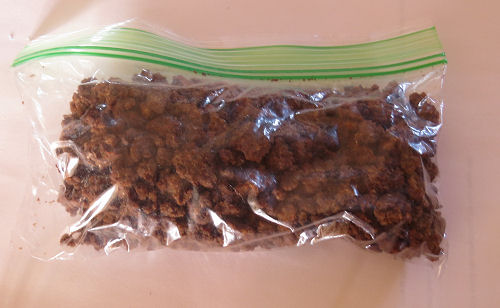
Be sure to label the bags- once dried it's really hard to tell one green from another!


if you like this blog, click the +1   or

Like This!

Green Scrambler Mix


Hot Meal

Moderately lightweight, very quick to prepare, good for short trips or the first morning of a longer trip. This would also be great for base camp.

I was given a container of Super Greens Scrambler made by Mountain Standard. If I had purchased it, the cost is $4 or more. Also, the container is large. Both of these are ridiculous for what you get. Make your own!

Mountain Standard Super Greens Scrambler

This is what you get in that container! Just dry some Kale, Spinach and Parsley (or buy dried parsley flakes)

Mountain Standard Super Greens Scrambler

See How to Dry Herbs

Cooking before packaging - none
Dehydrate before packaging - the greens
Cooking in camp - pan, spoon or spatula and a small amount of oil/butter/margarine

At Home:
This recipe is 1 main dish serving- multiply by how many you need

Package in a baggie, sandwich to quart size, depending on how many you are feeding:

2 T. dried kale flakes
2 T. dried spinach flakes
1 T. dried parsley flakes
1/2 T. dried onion bits
1/4 t salt
pepper
a dash of turmeric
a dash of chili pepper if you like things spicy!
1 t. dry milk

Package separately- in a plastic egg holder, or padded in paper towel in a hard-sided container: 2 eggs per person, and a small bit of some sort of oil for frying the eggs.

Add a small slip of paper with the in-camp directions. You will thank yourself later.

In Camp:
1. Soak the herb mix in about a quarter cup of water per serving until reconstituted, about 5 minutes. Add more water if desired.
2. Break the eggs into the plastic bag with the soaked greens and squish until mixed thoroughly.
3. Heat the oil/margarine in a pan, add the mixed eggs and greens and scramble until cooked.

Experiment with other spices or other herbs!

if you like this blog, click the +1   or

Like This!

Thursday, September 13, 2018

Packaging Small Square Crackers in Boxes


Packaging Tip

Yes, a small box will add maybe two-tenths of an ounce of weight, but it's not much fun if you've planned to have crackers and dip and you only have a pile of cracker crumbs after they've spent four days in your pack. This tiny bit of care at home is well worth it.

This tip works with small rectangular or square crackers such as Cheese-It, Town House flatbreads, Chicken-In-A-Biscuit, Triscuits, etc. Any cracker about 1" x 1.5" can be kept safe this way. You just have to find a box with a narrow dimension that matches one side of the cracker.

Examples of potentially useful boxes
 small cardboard boxes

At Home:

As you are preparing food, don't throw away or break down boxes with narrow bases or other potentially useful shapes until all your food is packaged. Pudding boxes are a good size, too. Fill the box with crackers- one or two rows, depending on how many crackers you need. But do fill each row. You don't want room for the crackers to shift and jostle. If you really don't want to fill a row, stuff the empty space with a wad of wax paper or plastic bag or something.

One completely filled row of flatbread crackers in a lined box
crackers re-packaged in a small cardboard box

Line the box with a cheap bit of plastic- saran wrap, a fold-over sandwich bag, even wax paper-- just something to keep the crackers clean and add a bit of padding.

crackers re-packaged in a small cardboard box

Cut off the top of the bag, cut off extra height on the box, cut down the corners to the level of the crackers. Tape shut and label.

In Camp:

Open and eat. You will seldom have broken crackers if you do this! Carry out all trash!

if you like this blog, click the +1   or

Like This!

Wednesday, September 12, 2018

Pizza Bowl


Hot Meal

Medium weight, very filling, adaptable, easier with 2 pans

pizza bowl backpacking hot meal

See How to Dry Onions
See How to Dry Meat

Cooking before packaging - none
Dehydrate before packaging - sauce, hamburger
Cooking in camp - boiling water and simmer

At Home:
This recipe is 2 main dish servings

Mix together:
8 oz pizza sauce
1/3 c. cream of mushroom soup, undiluted
one small chopped onion
spread this on saran wrap about 1/4 inch thick and let dry to leather

Package in a bag:
4 oz. pasta- elbow macaroni or small rigatoni is good

Dehydrate:
1/4 to 1/2 pound ground beef or sausage
when thoroughly dry, package in a separate bag

When sauce leather is dry, package it with 12 slices of pepperoni cut into small chunks

You now have 3 bags of ingredients. You also need 2 oz of mozzarella cheese (string cheese keeps well, or you may have a block of mozzarella in the lunch bag)

Add a small slip of paper with the in-camp directions. You will thank yourself later.

In Camp:

If you only have one pan, boil the pasta first, drain and put it in your bowl so you can re-use the pan
boil 2 c. water, add the dried meat and simmer until it is reconstituted
Add the sauce mix to the meat and simmer until smooth and hot
Mix the sauce and meat with the pasta
Cut up the mozzarella into small bits on top and let it melt a bit.

You probably won't have a breakable bowl in camp, but this is what it looks like made up
pizza bowl backpacking hot meal

You can add pretty much anything you like on pizza to this. Cut up and dehydrate bits of green pepper, olives, pineapple, etc. If you like bacon on pizza I suggest using fake bacon bits because the real ones can go rancid.

if you like this blog, click the +1   or

Like This!

Tuesday, September 11, 2018

Date Nut Logs


Snack/ Dessert

Really delicious with no valueless filler ingredients, they are not too messy but are a bit sticky

date nut logs


Cooking before packaging - yes
Dehydrate before packaging - none
Cooking in camp - none

At Home:
This recipe makes 8- 12 logs- you determine the size you want

1.
Toast the oatmeal and nuts in a jelly roll pan or cake pan. About 375° for 10 minutes. You just want them lightly brown- they will brown a bit more after removed from oven so don't overdo it.

1 1/2 c. oatmeal
1 c. nuts (sliced almonds, walnut bits, pecan bits, etc)

2.
Chop 1 c (220g) dates till the pieces are smaller than raisins. You can also use a food processor for this if you have one.

3.
Melt together 1/4 c. smooth peanut (or almond) butter and 1/4 c. honey.

4.
Mix all ingredients together and combine thoroughly. You can add other things like crushed banana chips, other fruits, etc. Chocolate chips do not travel well on summer trips, but mini-M&Ms might be OK. You may need to increase the honey and peanut butter to bind things if you add a lot of extra ingredients.

5.
Make into logs or balls, and place in individual bags


In Camp:

Open the bag and eat!

if you like this blog, click the +1   or

Like This!

How to Dry Meat


General How-To

Provides protein and texture in the diet

1/2 pound of dehydrated hamburger
dehydrated hamburger

The two important things about drying meats for use in meal packets are 1) to remove as much fat as possible and 2) make the pieces small.

At Home:

Canned meats:

Canned meats work very well to dehydrate because they have been cooked to the point that they are very tender. It is important to choose water pack instead of oil pack where there is a choice to reduce the amount of fat. Fat is your enemy in drying foods because it prevents good dehydration and will go rancid.

1. Drain the meat thoroughly
2. Spread in a thin layer on paper towels in the dehydrator
3. Dry thoroughly- crumbles should be hard, not leathery

Examples:
water pack tuna
water pack salmon
chicken
potted meat spreads
canned stew (if you shred the chunks of meat)

dehydrated water-pack tuna
dehydrated tuna

Ground meats:

Ground meats can be successfully dehydrated by this method:
1. Fry the meat, breaking up the meat into small crumbles
2. Drain the fat
3. Place meat in a colander with small holes and run hot water through it for several minutes
4. Pat the meat dry with paper towels
5. Spread in a thin layer on paper towels in the dehydrator
6. Dry thoroughly- crumbles should be hard, not leathery
7. Change the toweling if a lot of additional grease has been pulled out of the meat (usually required when doing sausage)

Examples:
hamburger
venison burger (works well because there is so little fat in the meat)
ground sausage

sausage, cooked, drained and rinsed, spread in dehydrator
dehydrated hamburger

sausage partially dehydrated, requiring a paper change. Note the grease that has soaked into the paper towel
dehydrated hamburger

Cooked shredded meats:

Meats can be pre-cooked until very tender and shredded before dehydrating. As always, the pieces must be small for even drying and good reconstitution.

Examples:
pulled pork
chicken
turkey

In Camp:
Boil water and reconstitute the meat before adding other ingredients because the meat takes a little longer to soften than vegetable leathers and other possible meal parts. Alternatively, you can add a little water to the meat pack a few hours before the meal and let it sit. Be aware that dried meat crumbles/shreds can poke small holes in storage bags. If you are going to add water and carry the meat in your pack to reconstitute, you probably should double bag to prevent gear being soaked with meat juice.

if you like this blog, click the +1   or

Like This!

Monday, September 10, 2018

Veggie Plops


Side Dish, Salad

Very lightweight, surprisingly satisfying

These provide vegetables and dairy in a crunchy format. You could even break them up on purpose to sprinkle on mashed potatoes or soup.

Veggie Plops

See How to Dehydrate Liquids

Cooking before packaging - none
Dehydrate before packaging - yes
Cooking in camp - none

At Home:
This recipe makes 50-60 plops

Combine 1 cup LOWFAT or FAT FREE cottage cheese with flavoring in a blender or the container of an immersion blender. Blend until nearly smooth and the consistency of a thick milkshake. Add liquid a little at a time so you don't get it too thin.

Veggie Plops

Drop and spread in plops about 1 to 1.5 inches across on saran wrap. Dehydrate till crisp.

Veggie Plops

Flavor suggestions- each is with 1 c. cottage cheese:

My personal favorites:
Pickle- use pickle juice and some cut up pieces of pickle
V-8- add enough V-8 to get the desired consistency

Others I have tried:
Italian Spinach- 3 oz. raw spinach, 1/2 t. Italian seasoning, a little milk
Tomato Chili- 1 large tomato, 1/4 t. chili powder
Salsa- add salsa to get the desired consistency
Green Pepper- 1 green pepper, 1 T. dried parsley, 1 T. chives
Cottage Garden- 1 carrot, 1 T. dried parsley, 2 radishes, 1 stalk green onion (these weren't as good as I expected)
Spaghetti- 1 T. parmesan cheese, spaghetti sauce to get the desired consistency
Lemon Cuke- 1 peeled cucumber 1/2 lemon including juice and zest (these were very bland)

Invent your own!

Package 10 or more in a snack bag for one serving. They are more filling than you would expect.


In Camp:
eat right from the bag

if you like this blog, click the +1   or

Like This!